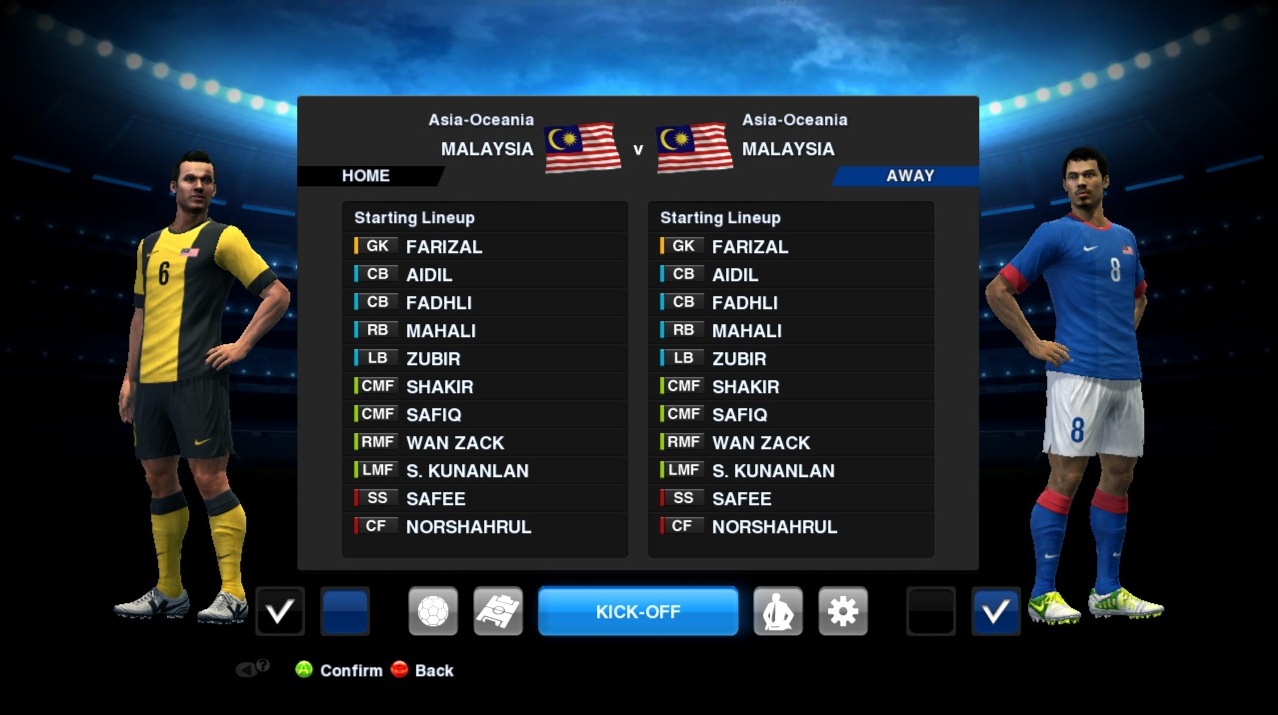
How To Run Android Applications in Windows PC or Mac

As we all know that Android is made a bug name with its operating system and popular apps running in Android smartphone but now it is not limited to android smartphone only. Now, you can run android apps in your windows using program called Bluestack. BlueStacks App Player lets you run apps from your phone fast and fullscreen on Windows and Mac. 


Now, you are free to download any of your favorite android apps in your PC or Mac. like Whatsapp, Viber, Instagram, Insta Weather, Evernote, Accuweather, etc. Enjoy!

Install Lazy Load in Blogger

If your blog or website containing many images, Lazy Load will be very helpful to you. It can reduce the page loading time of your site. Lazy loader is a jQuery plugin written in JavaScript. It delays loading of images in (long) web pages. Images outside of viewport (visible part of web page) wont be loaded before user scrolls to them. Using lazy load on long web pages containing many large images makes the page load faster. Browser will be in ready state after loading visible images. In some cases it can also help to reduce server load. Lazy Load is a famous plugin for wordpress blogger.


#Steps:
1. Go to Dashboard ->> Design ->>; Edit HTML

2. Search this code (Ctrl + F), </head>

3. Then, paste the code below, before </head>
&lt;script charset=&#39;utf-8&#39; src=&#39;http://ajax.googleapis.com/ajax/libs/jquery/1.9.0/jquery.min.js&#39; type=&#39;text/javascript&#39;/&gt;

&lt;script type=&#39;text/javascript&#39;&gt;
//&lt;![CDATA[

/*
 * Lazy Load - jQuery plugin for lazy loading images
 *
 * Copyright (c) 2007-2009 Mika Tuupola
 *
 * Licensed under the MIT license:
 *   http://www.opensource.org/licenses/mit-license.php
 *
 * Project home:
 *   http://www.appelsiini.net/projects/lazyload
 *
 * Version:  1.5.0
 *
 */
(function($) {

    $.fn.lazyload = function(options) {
        var settings = {
            threshold    : 0,
            failurelimit : 0,
            event        : &quot;scroll&quot;,
            effect       : &quot;show&quot;,
            container    : window
        };
              
        if(options) {
            $.extend(settings, options);
        }

        /* Fire one scroll event per scroll. Not one scroll event per image. */
        var elements = this;
        if (&quot;scroll&quot; == settings.event) {
            $(settings.container).bind(&quot;scroll&quot;, function(event) {
              
                var counter = 0;
                elements.each(function() {
                    if ($.abovethetop(this, settings) ||
                        $.leftofbegin(this, settings)) {
                            /* Nothing. */
                    } else if (!$.belowthefold(this, settings) &amp;&amp;
                        !$.rightoffold(this, settings)) {
                            $(this).trigger(&quot;appear&quot;);
                    } else {
                        if (counter   &gt; settings.failurelimit) {
                            return false;
                        }
                    }
                });
                /* Remove image from array so it is not looped next time. */
                var temp = $.grep(elements, function(element) {
                    return !element.loaded;
                });
                elements = $(temp);
            });
        }
      
        this.each(function() {
            var self = this;
          
            /* Save original only if it is not defined in HTML. */
            if (undefined == $(self).attr(&quot;original&quot;)) {
                $(self).attr(&quot;original&quot;, $(self).attr(&quot;src&quot;));   
            }

            if (&quot;scroll&quot; != settings.event ||
                    undefined == $(self).attr(&quot;src&quot;) ||
                    settings.placeholder == $(self).attr(&quot;src&quot;) ||
                    ($.abovethetop(self, settings) ||
                     $.leftofbegin(self, settings) ||
                     $.belowthefold(self, settings) ||
                     $.rightoffold(self, settings) )) {
                      
                if (settings.placeholder) {
                    $(self).attr(&quot;src&quot;, settings.placeholder);    
                } else {
                    $(self).removeAttr(&quot;src&quot;);
                }
                self.loaded = false;
            } else {
                self.loaded = true;
            }
          
            /* When appear is triggered load original image. */
            $(self).one(&quot;appear&quot;, function() {
                if (!this.loaded) {
                    $(&quot;&lt;img /&gt;&quot;)
                        .bind(&quot;load&quot;, function() {
                            $(self)
                                .hide()
                                .attr(&quot;src&quot;, $(self).attr(&quot;original&quot;))
                                [settings.effect](settings.effectspeed);
                            self.loaded = true;
                        })
                        .attr(&quot;src&quot;, $(self).attr(&quot;original&quot;));
                };
            });

            /* When wanted event is triggered load original image */
            /* by triggering appear.                              */
            if (&quot;scroll&quot; != settings.event) {
                $(self).bind(settings.event, function(event) {
                    if (!self.loaded) {
                        $(self).trigger(&quot;appear&quot;);
                    }
                });
            }
        });
      
        /* Force initial check if images should appear. */
        $(settings.container).trigger(settings.event);
      
        return this;

    };

    /* Convenience methods in jQuery namespace.           */
    /* Use as  $.belowthefold(element, {threshold : 100, container : window}) */

    $.belowthefold = function(element, settings) {
        if (settings.container === undefined || settings.container === window) {
            var fold = $(window).height()   $(window).scrollTop();
        } else {
            var fold = $(settings.container).offset().top   $(settings.container).height();
        }
        return fold &lt;= $(element).offset().top - settings.threshold;
    };
  
    $.rightoffold = function(element, settings) {
        if (settings.container === undefined || settings.container === window) {
            var fold = $(window).width()   $(window).scrollLeft();
        } else {
            var fold = $(settings.container).offset().left   $(settings.container).width();
        }
        return fold &lt;= $(element).offset().left - settings.threshold;
    };
      
    $.abovethetop = function(element, settings) {
        if (settings.container === undefined || settings.container === window) {
            var fold = $(window).scrollTop();
        } else {
            var fold = $(settings.container).offset().top;
        }
        return fold &gt;= $(element).offset().top   settings.threshold    $(element).height();
    };
  
    $.leftofbegin = function(element, settings) {
        if (settings.container === undefined || settings.container === window) {
            var fold = $(window).scrollLeft();
        } else {
            var fold = $(settings.container).offset().left;
        }
        return fold &gt;= $(element).offset().left   settings.threshold   $(element).width();
    };
    /* Custom selectors for your convenience.   */
    /* Use as $(&quot;img:below-the-fold&quot;).something() */

    $.extend($.expr[&#39;:&#39;], {
        &quot;below-the-fold&quot; : &quot;$.belowthefold(a, {threshold : 0, container: window})&quot;,
        &quot;above-the-fold&quot; : &quot;!$.belowthefold(a, {threshold : 0, container: window})&quot;,
        &quot;right-of-fold&quot;  : &quot;$.rightoffold(a, {threshold : 0, container: window})&quot;,
        &quot;left-of-fold&quot;   : &quot;!$.rightoffold(a, {threshold : 0, container: window})&quot;
    });
  
})(jQuery);

//]]&gt;
&lt;/script&gt;

&lt;script charset=&#39;utf-8&#39; type=&#39;text/javascript&#39;&gt;

$(function() {

   $(&amp;quot;img&amp;quot;).lazyload({placeholder : &amp;quot;https://blogger.googleusercontent.com/img/b/R29vZ2xl/AVvXsEgfRVXmTp5ikwn7UNLqsza79px1CvPaaHnoWQug0hQWqn3g3i69PehRyZBkwRa5HzN_HIdMQE80HLLbUgqa1WhqrFd3omj_g3NO0uYRtd9OnVZn7ZkH7F2Y6QHWEcnu8gPa-Crxckm7j1Y/s1600/grey.gif&amp;quot;,threshold : 200});

});

&lt;/script&gt;

4. Save your template.

Refresh your blog to see the result. Finish!

Enjoy boss!

How To Add Thumbnails To Video Files in Windows Explorer

Video file won't show the thumbnail? It happen to some of windows 7 user. Wish you had thumbnails to those video files in Windows Explorer? Media Preview can do the job for you.


Download Link - Media Preview

Now all of your video file will be a thumbnail. Enjoy! =D

+credit: Tekzilla

How To Hide Blog Posts From Blogger Home Page

Blog post is the main item sholud have in blogger main page. But if you have some idea to your blog theme and want to hide the blog post. This tutorial is just for you.


#steps:
1. Go to Dashborad => Design => Edit HTML (Edit Template HTML)

2. Search this code (Ctrl + F), ]]></b:skin>. Paste the code below after ]]></b:skin>.

<b:if cond="data:blog.url == data:blog.homepageUrl">
<style type="text/css">
.post, .sidebar, #blog-pager {display:none;}
</style>
</b:if>
<b:if cond="data:blog.url == data:blog.homepageUrl">
<style type="text/css">
body#layout .sidebar {display:inline;margin-top:200px;}
</style>
</b:if>

With the code, you hide your blog post and sidebar. If you want to show your sidebar, just remove the .sidebar, code.

3. Save and finish. Refresh to see the result.

Like and share man! :)

+credit: Anandz.co.in

How To Make One Page Landscape in Microsoft Word

I'm sure you guys also experienced this problem. When you want to make a single landscape page, all pages follow the same. Here is how to make only single page in landscape layout.

1. Go to the last page you want to keep vertical (Portrait) then select Page Layout » Breaks » Next Page


2. Now click anywhere in the page where you want to have the horizontal page (Landscape) and go to Page Layout » Orientation and select Landscape

3. Do the same steps for the following page, the one after the landscaped one, but this time choose Portrait. Only do this if you want to restore the Portrait orientation back to normal.


Now, you're know it. :)

How To Root HDC Galaxy S3 Pro

If you have a phone Samsung Galaxy S3 clone for the HDC Galaxy S3 Pro, you can refer to this video for doing root on your phone. It is very simple and easy. Check it out!


Easy right? If you live in Malaysia and would like to get this phone, purchase it here. Also Galaxy Note II, here.

Enjoy ~

MemInfo - Check RAM Usage Easily

Sure you can use the task manager only to check the RAM usage and also for many other functions. However, for those who want to monitor the amount of usage over time, and do not want to open a any prompt window, you can just use MemInfo.


MemInfo add a small icon on the Task Bar in Windows, and show RAM usage figures that are updated in real-time. Users can also click on it and look at the top ten applications that use high RAM at any time, and off it continues to pass through, thus emptying the use of your computer's RAM memory.

 For those of you who are interested can download MemInfo to your Windows computer, and began to monitor the use of RAM easily.

Download PESEdit 2.6 Patch including Malaysia Team


New Features: 
• New teams: Malaysia, Atlético Paranaense, Criciúma, Goiás, EC Vitória
• New 2nd division: Brasileirão Série B (Atlético Goianiense, Figueirense, Palmeiras, Sport)
• Updated Classic National Teams (new squads for England, Germany, Netherlands, Brazil, also new faces for France, new kits for Brazil)
• Added possibility to switch to official 1.03 patch by Konami for online play (without patch content)
• New kits: Barcelona, Barcelona B, Braunschweig, Charlton, Classic Brazil, Corinthians, Derby, Kaiserslautern, Leeds, Nordsjælland, Nottingham, Paris, Portugal, QPR, Santos, Thailand     45+ new faces (incl. Deulofeu, Michu, Verratti, Rivaldo etc.)
• New boots: Puma Powercat 1.12 Black/Green, Puma Evospeed Green/Blue, all Konami DLC boots     • Created 10+ missing players (incl. Max Meyer (Schalke), Iván Pérez (Lugo), Nikola Đurđić etc.)
• Updated Mexico NT
• Includes new DLC 3.00 incl. all new boots

General Features:
• Added Bundesliga, Primera Division Argentina, Russian Premier League, 2. Bundesliga, Liga Adelante, Npower Championship, Serie B, Ligue 2, Brasileirão Série B
• Added other teams (Viktoria Plzen, BATE Borisov, Metalist Kharkiv, Rubin Kazan, Anzhi, and more)
• Correct kits for all Premier League, Liga ZON Sagres + all National & Classic Teams
• Corrected names for fake players in unlicensed National teams and ML unlockable players
• Faces: More than 450 new faces
• Fixed kits for a lot teams including Barcelona, Manchester United and Sevilla
• Includes DLC 2.0
• Scoreboard and stadium switch in selector
• Removed blur

Download Direct Link:  Part #1 | Part #2
password = www.softgozar.com

Other Download Link:
Single Link (Choose one link) - Depositfiles | TurboBit | LetitBit

Enjoy & spread it to your friends!

+credit to: PESEdit Team

How To Enable Consumable Item in PES 2013

In PES 2013, there is a comsumable item option if you play Master League and Become a Legend mode. But it is inaccessible. It is an item that is useful to increase the players fitness and strength. It only can be access if you play online. If you play offline, follow this steps to enable the consumable items.


Watch this tutorial video:


All you need is PES2013 - Item Editor tool. Download here.

Once you apply it, it's work with both Master League and Become a Legend. Enjoy and share! And don't forget to subscribe to get latest news from us.

How To Add Popular Post Widget Like Wordpress in Blogger

Multi-colored Popular Post widget on wordpress was very charming and colorful. Now blogger users also can use this widget. We also use this widget in this blog. You also definitely will love it. 


Note: Before making any changes to your template, take a full backup of your blogger template.

#Step:
1. Go to Dashboard ->> Layout ->> Add a gadget ->> POPULAR POST


2. Save. Now, go to Template ->> Edit HTML

3. Click Expand Widget Template. Search this code (Ctrl + F), 

/* Variable definitions
====================
4. Just under the code, paste this code below:
<Variable name="PopularPosts.background.color1" description="background color1" type="color" default="#fa4242" value="#ff4c54"/>
<Variable name="PopularPosts.background.color2" description="background color2" type="color" default="#ee6107" value="#ff764c"/>
<Variable name="PopularPosts.background.color3" description="background color3" type="color" default="#f0f" value="#ffde4c"/>
<Variable name="PopularPosts.background.color4" description="background color4" type="color" default="#ff0" value="#c7f25f"/>
<Variable name="PopularPosts.background.color5" description="background color5" type="color" default="#0ff" value="#33c9f7"/>
<Variable name="PopularPosts.background.color6" description="background color6" type="color" default="#ff0" value="#7ee3c7"/>
<Variable name="PopularPosts.background.color7" description="background color7" type="color" default="#ff0" value="#f6993d"/>
5. Then, search this code (Ctrl + F), ]]></b:skin>. Paste the code below before it.
#PopularPosts1 ul{margin:0;padding:5px 0;list-style-type:none}
#PopularPosts1 ul li{position:relative;margin:5px 0;border:0;padding:10px}
#PopularPosts1 ul li:first-child{background:$(PopularPosts.background.color1);width:90%}
#PopularPosts1 ul li:first-child:after{content:"1"}
#PopularPosts1 ul li:first-child   li{background:$(PopularPosts.background.color2);width:85%}
#PopularPosts1 ul li:first-child   li:after{content:"2"}
#PopularPosts1 ul li:first-child   li   li{background:$(PopularPosts.background.color3);width:80%}
#PopularPosts1 ul li:first-child   li   li:after{content:"3"}
#PopularPosts1 ul li:first-child   li   li   li{background:$(PopularPosts.background.color4);width:75%}
#PopularPosts1 ul li:first-child   li   li   li:after{content:"4"}
#PopularPosts1 ul li:first-child   li   li   li   li{background:$(PopularPosts.background.color5);width:70%}
#PopularPosts1 ul li:first-child   li   li   li   li:after{content:"5"}
#PopularPosts1 ul li:first-child   li   li   li   li  li{background:$(PopularPosts.background.color6);width:65%}
#PopularPosts1 ul li:first-child   li   li   li   li   li:after{content:"6"}
#PopularPosts1 ul li:first-child   li   li   li   li   li  li{background:$(PopularPosts.background.color7);width:60%}
#PopularPosts1 ul li:first-child   li   li   li   li   li   li:after{content:"7"}
#PopularPosts1 ul li:first-child:after,
#PopularPosts1 ul li:first-child   li:after,
#PopularPosts1 ul li:first-child   li   li:after,
#PopularPosts1 ul li:first-child   li   li   li:after,
#PopularPosts1 ul li:first-child   li   li   li   li:after,
#PopularPosts1 ul li:first-child   li   li   li   li   li:after,
#PopularPosts1 ul li:first-child   li   li   li   li   li   li:after{position:absolute;top:20px;right:-15px;border-radius:50%;background:#353535;width:30px;height:30px;line-height:1em;text-align:center;font-size:28px;color:#fff}
#PopularPosts1 ul li .item-thumbnail{float:left;border:0;margin-right:10px;background:transparent;padding:0;width:40px;height:40px}
#PopularPosts1 ul li a{font-size:12px;color:#444;text-decoration:none}
#PopularPosts1 ul li a:hover{color:#222;text-decoration:none}
#PopularPosts1 img{-webkit-transition:all 0.5s ease;-moz-transition:all 0.5s ease;transition:all 0.5s ease;padding:4px;background: #eee;background: -webkit-gradient(linear, left top, left bottom, from(#eee), color-stop(0.5, #ddd), color-stop(0.5, #c0c0c0), to(#aaa));background: -moz-linear-gradient(top, #eee, #ddd 50%, #c0c0c0 50%, #aaa);-webkit-border-radius: 4px;-moz-border-radius: 4px;border-radius: 4px;-webkit-box-shadow: 0 0 3px rgba(0,0,0,.7);-moz-box-shadow: 0 0 3px rgba(0,0,0,.7);box-shadow: 0 0 3px rgba(0,0,0,.7);}
#PopularPosts1 img:hover{-moz-transform: scale(1.2) rotate(-350deg);-webkit-transform: scale(1.2) rotate(-350deg);-o-transform: scale(1.2) rotate(-350deg);-ms-transform: scale(1.2) rotate(-350deg);transform: scale(1.2) rotate(-350deg);-webkit-box-shadow: 0 0 20px rgba(255,0,0,.4), inset 0 0 20px rgba(255,255,255,1);-moz-box-shadow: 0 0 20px rgba(255,0,0,.4), inset 0 0 20px rgba(255,255,255,1);box-shadow: 0 0 20px rgba(255,0,0,.4), inset 0 0 20px rgba(255,255,255,1);}
.JayRyan-moresubs {
background: none repeat scroll 0 0 #EBEBEB;
border-style: solid;
border-width: 1px;
border-color: #fff #ccc #ccc;
padding: 3px 8px 3px 3px;
text-align: right;
font-size: 7px;
letter-spacing: 1px;
}
.JayRyan-moresubs a {
display: inline-block;
font-weight: bold;
color: #1E598E;
text-decoration: none;
text-shadow: 1px 1px 1px #fff;
}
6. Then, highlight this code. From <b:widget id='PopularPosts1' to </b:widget>
<b:widget id='PopularPosts1'

-----------

</b:includable>
</b:widget>
7. Replace the higjligted code with this code:
<b:widget id='PopularPosts1' locked='false' title='Top 3 Of The Week' type='PopularPosts'>
<b:includable id='main'>
<b:if cond='data:title'>
<h2><data:title/></h2>
</b:if>
<div class='widget-content popular-posts'>
<ul>
<b:loop values='data:posts' var='post'>
<li>
<b:if cond='data:showThumbnails == &quot;false&quot;'>
<b:if cond='data:showSnippets == &quot;false&quot;'>
<a expr:href='data:post.href' expr:title='data:post.title' rel='bookmark'><data:post.title/></a>
<b:else/>
<a expr:href='data:post.href' expr:title='data:post.snippet' rel='bookmark'><data:post.title/></a>
</b:if>
<b:else/>
<b:if cond='data:showSnippets == &quot;false&quot;'>
<b:if cond='data:post.thumbnail'>
<img class='item-thumbnail' expr:alt='data:post.title' expr:src='data:post.thumbnail'/>
<b:else/>
<img alt='no image' class='item-thumbnail' src='https://blogger.googleusercontent.com/img/b/R29vZ2xl/AVvXsEjrPLsJsea3y_TMSPLYv6lCu4ql1UE7aMy_pjyZt0U43mwEMBnd5rDwwFMANCBAzv_haskbEHeoz7_Od6VG-Q1hv-C9a8T2Y5Kw9x0zLNSI5rd5ghH-E2UifniHlTjQZxJx1k0vj5cMBts/s1600/Default..Logo.png'/>
</b:if>
<a expr:href='data:post.href' expr:title='data:post.title' rel='bookmark'><data:post.title/></a>
<div class='clear'/>
<b:else/>
<b:if cond='data:post.thumbnail'>
<img class='item-thumbnail' expr:alt='data:post.title' expr:src='data:post.thumbnail'/>
<b:else/>
<img alt='no image' class='item-thumbnail' src='https://blogger.googleusercontent.com/img/b/R29vZ2xl/AVvXsEjrPLsJsea3y_TMSPLYv6lCu4ql1UE7aMy_pjyZt0U43mwEMBnd5rDwwFMANCBAzv_haskbEHeoz7_Od6VG-Q1hv-C9a8T2Y5Kw9x0zLNSI5rd5ghH-E2UifniHlTjQZxJx1k0vj5cMBts/s1600/Default..Logo.png'/>
</b:if>
<a expr:href='data:post.href' expr:title='data:post.snippet' rel='bookmark'><data:post.title/></a>
<div class='clear'/>
</b:if>
</b:if>
</li>
</b:loop>
</ul>
</div>
<div class='JayRyan-moresubs'>
<a href=' '> </a>
</div>
</b:includable>
</b:widget>

8. Save it. Done!

Refresh your blog to see the result.

• You can show up to 7 most popular entries.
• You can change the background color of the popular posts widget, going to Design >> Template Designer >> Advanced >> PopularPostsBackground and select any color you want.

Share it to recommend it!