Top 10 Android Hidden Codes for Smart Phones Revealed

Most of the Android user are unfamiliar with this codes. Most of the did not know about this hidden codes. I guess, it is not important for them to know. But for the user with high curiosity, they love to know this. Here are the codes:

» IMEI Number *#06#

» Test the touch screen *#*#2664#*#*

» Phone information, usage data & battery information *#*#4636#*#*

» Camera info - Mega pixel & zoom capacity *#*#34971539#*#*

» Immediate backup of videos, songs & images *#*#273282*255*663282*#*#*

» Full information about software and hardware *#12580*369#

» Test back light or vibration *#*#0842#*#*

» Control USB logging *#872564#

» Format your smartphone *2767*3855#

» Diagnostic configuration *#9090#

Some might work, some might not work. It depends on your android mobile. Just have fun! :)

How To Remove Links From Blogger Comments Automatically With jQuery

Every blogger hates spammer. So to combating them is by preventing the use of HTML-based codes that enables the embedding of hyperlinked texts. You can remove links from blogger comments Automatically with jQuery. Simply follow the instructions below.

#STEPS:
1. Go to Dashboard ->> Template ->>; Edit HTML

2. Search this code (Ctrl + F), </body>, and then copy/paste the code below just right above it.
<script src='https://ajax.googleapis.com/ajax/libs/jquery/1.8.3/jquery.min.js'/>
<script>$('.comment-content a[rel$=nofollow]').replaceWith(function(){return ($(this).text());});</script>

3. If you want the hyperlinked texts removed entirely than just disabling the hyperlinked text, then copy/paste this code below instead.
<script src='https://ajax.googleapis.com/ajax/libs/jquery/1.8.3/jquery.min.js'/>
<script>$('.comment-content a[rel$=nofollow]').hide());</script>

NOTE: If you already have the part that’s highlighted already in your template’s code then exclude it and just copy the remainder of the code.

4. Save your template. That’s it. Done!

Share it to your friends!

How To Setup Mail Apps in Windows 8

Setup your email to work more comfortable and close with your mail or mailbox.With the help of this video you can easily setup your mail apps in windows 8. Just follow the steps, shows in this video.


Credit for Randy Mckown this nice video.

How To Disable Lock Screen in Windows 8

Time is important, and for others, it's simply just being impatient. Having your computer start up as quickly as possible is usually a plus for anyone. If you have Windows 8, the start up times have drastically improved compared to older systems, Win7, WinXP. You want to speed up things ever faster, just disable the lock screen.

The lock screen is a nice little addition, but not necessary for PC users. It's just a cover for the login screen that tells you the time, weather, and date. To get to the login screen, you can drag it up and away, hit escape, or click on it. To get rid of it completely, follow these quick guide.

Step 1: Open Run
You will need to launch the Local Group Policy Editor. To do this, hit the Windows Key and R to open up the all-too-familiar Run program. 

Step 2: Open Local Group Policy Editor
Type gpedit.msc and then click OK. This will now open up the Local Group Policy Editor.

Step 3: Open Personalization
From the screen shown above, click on Computer Configuration -> Administrative Templates -> Control Panel -> Personalization.

Step 4: Lock Screen Settings
You will see the option Do not display the lock screen. Double-click on this and the window below will pop up.

Step 5: Enable "Do Not Lock"
The Do not display lock screen is currently not configured, so make sure to select Enabled and press OK.

Not sure yet? Follow the steps from this video guide.

Double Check  To ensure you have done everything correctly, go back to the Local Group Policy Editor -> Computer Configuration -> Administrative Templates -> Control Panel -> Personalization, and make sure that it shows Do not display lock screen is Enable.

 Now, your Lock Screen should no longer come up. Share to your friends!

How To Embed Youtube Video From Start to End at the Specific Time

There would be many a situation where you may want to just embed a Youtube video from one point to another and not the whole video. You may want to direct your readers or viewers to a certain clip of a particular video and not the whole video. You can easily chop or trim a Youtube video by making a small modification to the url. Youtube itself provides an easy way to start the video from a particular point, but the below method would help you to not only start the video but also stop at a certain point. Since this method is free and you need not download anything and is very simple to follow, let's do this!

VIDEO GUIDE

Go to this link, Tech Tips For All

If you want to add this link in PowerPoint, just copy the above link and follow the below video.  This is also a working example for the above form. Watch the video guide below.


Yeah! It's just that easy. Leave a commenet, kindly appreciate it! :)

How To Block Yourself from Being 'Seen' by Facebook Friends

Facebook recently added some features to its Messages, Chat and Groups that a lot of people have found to be somewhat sketchy. 

In Groups, anyone with permission to view a post can hover over it and see a list of other people who have read it. This could actually be functional if you're using it to coordinate meeting times or sharing documents for work. But when it comes to Messages and Chat, it gets a little creepy. Not only will people always know if you've read a message or not, "you’ll now see the name of town or city from which a message was sent in-line if your conversation partners have location enabled."


If you don't want your Facebook Messenger to have a built-in white lie detector, try Chat Undetected. It's a browser extension that works across Chrome, Firefox, Internet Explorer and Safari. All you have to do is install it and it disables read receipts so you can stay incognito when you want to be.

This extension is made by Crossride.com

How To Bypass Password Login Screen on Windows 8

It's good to password-protect your PC to make sure that your personal files, folders, and important documents are safe and can't be modified without your permission. Though, entering the password all of the time before using your computer might frustrate you.  Here, you will be find an easy way to remove passwords in such a way that Windows will automatically get to the desktop without asking you to enter the system password. Though, you can restore it back whenever you feel that your system is not safe anymore.


VIDEO GUIDE

You can follow the same steps to bypass password screen on previous version of Windows too, not just Windows 8. Enjoy!

How To Disable Intro, Replay, Loading Circle Color and Referee Strictness in PES2013

Some of the gamer like to watch replays after scoring goal because they enjoy it or to annoyed their friends. But for some people it is wasting time, it is better to be save some time and to do some other work. We've got all you need. Now you can disable PES2013 Intro, Replay, Loading Circle Color and even the referee strictness. Just get this tool.


Downlod the tool here - Replay Disabler by Cabry


HOW TO USE
1. Use a clean *nodvd* .exe file

2. Open your pes2013.exe

3. Change the settings

4. Save the pes2013.exe

Done!

+credits: cabry & PesPatch

How To Cut SIM Card To Micro SIM or Nano SIM


This video teaches viewers how to cut a SIM card from a standard (Mini SIM) format down to either a Micro SIM (For the NExus 4 etc.) or Nano SIM (for the new iPhone 5). You can also use a pre-configured SIM cutter like the one linked above if you're uncomfortable cutting your own SIM card using scissors. Make sure you use a sharp scissor. Follow this video guide.


Download and print this template - http://goo.gl/8rZR3H

Don't forget to share this tutorial to your friends!

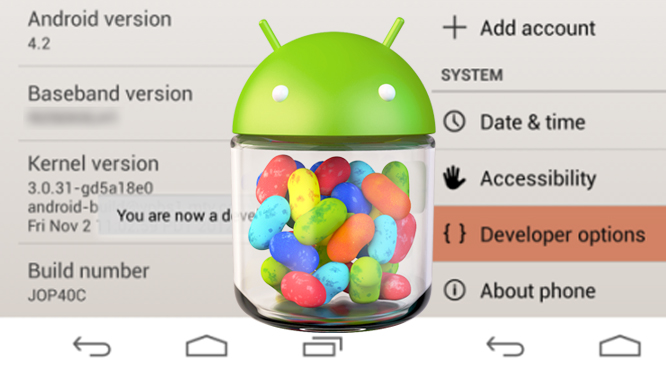
How To Enable Developer Options in Android 4.2 Jelly Bean

If you have gotten an Android 4.2 Jelly Bean device, you may have noticed that the “Developer Options” Menu Item is missing. In actual fact, it is hidden. Yes, Google has hidden the feature in the latest version of Android 4.2. To some extent, the move makes sense because the typical user may not need to know about this option. In fact, for the unacquainted, this option can be more confusing than helpful. Hence, the hiding of this option.


To restore this “Developer Mode” option
1. Go to Settings, and select “About Phone”

2. Select “Build Number” option at the end of the scroll list items.

3. Now, tap on the “Build Number” option repeatedly.

4. On your third tap, you would likely going to see a message saying that you only have 4 more taps to go to become a developer.

5. So you just continue tapping 4 more times; you will need 7 taps.

6. By your seventh tap, you will get the ‘Developer Mode’ activated – the message “You are now a developer!” is shown.

7. Navigate back to the “Setting” page on your device. If you have done it right, you should see “Developer Option” menu item inside the “Settings”.

8. Select the Developer Options. Check USB debugging and then OK.

VIDEO HOW TO ENABLE DEVELOPER OPTIONS IN ANDROID 4.2 JB

Finish!